PDP-11/45: LA30 repair
Sat 25 November 2017 by Fritz MuellerOnce again its been a little while since I've had to work on PDP-11 stuff or put any updates here; the day gig has been pretty intense lately.
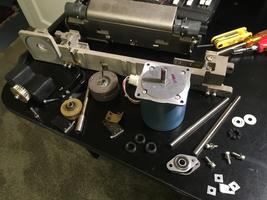
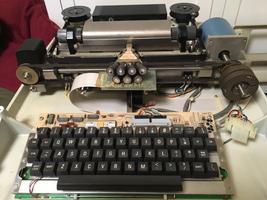
Recent efforts have been focused on restoration of an LA30 printing terminal. This was really filthy (including a mouse nest, yuck) so in addition to the usual electronics work it had to be completely disassembled for proper cleaning and lubrication.
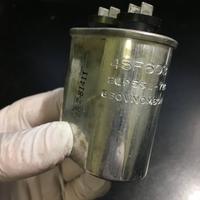
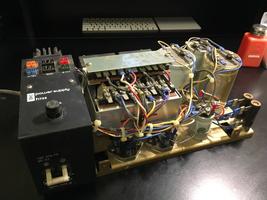
First off, the H735 power supply. This is a pretty straightforward supply, but has an oil cap in the ferro- resonant circuit that is listed as a PCB-containing component; replaced this with a modern equivalent. Also pulled and reformed all the large electrolytic caps on the bench per usual. No real trouble or surprises with this supply.
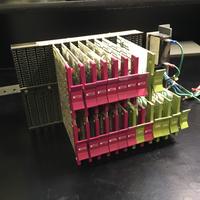
Logic assembly looks good; everything is there (mine is an LA30-P, the parallel interface version) with no obvious scorches or toast. Backplane intact and chip pin corrosion doesn't look too bad. Needed some compressed air to blow out all the dust bunnies.
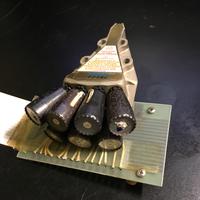
Print head also looks to be in decent shape; all of the pins fire freely when activated momentarily with a 15 VDC bench supply.
Most of the work here was involved in disassembling the top section of the terminal, including the keyboard and carriage assembles, where most of the filth had accumulated. There are a lot of parts and pieces, with castings, bearings, machined shafts, stainless and brass throughout. This thing was really well built!
The ribbon-like paper drag springs were all either torn, mangled, or cracked/cracking; I fashioned some replacements by cutting and drilling 1/2" x 3" strips of .002 steel shim stock. The rubber shock isolation mounts for the carriage assembly had also hardened and decayed. These look very close to the original; I put some on order. Replaced the bumpers on the carriage rails with some less expensive 3/8" chassis grommets. After cleaning, hit the slide rails with dry film silicone lubricant (Molykote 557) and pivot and carriage cam plates pins with a good lithium grease (Molykote BR2 Plus).
Ribbon drive motor bearings were very gummy, and one of the ribbon motors had seized. These motors are quite serviceable though; you can pull the bottom bearing cap and remove the rotor, clean the rotor shaft and bearings of old lubricants, apply fresh and reassemble. These are self-aligning bearings, so don't forget to give the assembly a few taps all around with a mallet after reassembly to shake them into true.
Consumables: compatible ribbons are still plentiful on eBay, so I ordered a few. Paper is an unusual width at 9-7/8". A few vendors on Amazon still seem to carry it, but it might be wise to lay in stock of a carton or two while it is still obtainable.
Fired it up after reassembly. No smoke (good!) and it feeps once reassuringly at power on. Ribbon motors and clutches seem to be working, and the ribbon advances. Activating the ribbon reverse switches manually reverses the ribbon movement per expectation.
If the carriage is closed with paper loaded, the print head will home left and then move right after about a second or so (per expectation; "last character visibility" feature) and ribbon advance halts. Local line feed from the front panel switch works. All of this indicates a good deal of the logic and the motor drive are already working correctly.
However: the front panel "ready" indicator does not light, and a quick loopback test (jumper A15R2 to A15C2 on the backplane) does not print any characters in response to the keyboard. Will pick up here with logic debug next time.
