PDP-11/45: VT52
Sun 03 January 2016 by Fritz MuellerSpent some time reviving a VT52 that I intend to use with the PDP-11. This was a pretty nice eBay find. There was some oxidation and flakiness with the connectors to the chargen ROM daughter card (I remember this being typical of VT52s even back in the day). A little more difficult to track down were some flaky solder joints around the clock chip. But, everything else seems to be in pretty good shape and its working well now! Here it is hooked up to a Linux VM on my macbook, compiling some LSST code to generate some output as a test drive:
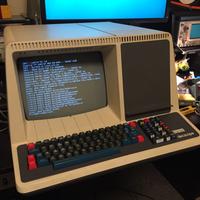
Man, seeing that funky font again, with its non-descending-descenders, is really great! Surprisingly, it doesn't seem to be available in digital format anywhere, unlike the later VT100 fonts, etc. Try as I might, I couldn't seem to find the chargen ROM listing in any of the DEC documentation archives, either.
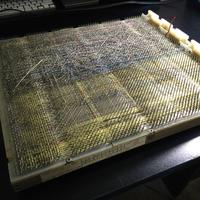
Well, I do have a Digilent FPGA eval card and some level conversion chips laying around, so as a holiday hack project I put together a quick ROM scanner in Verilog, interfaced it to the VT52 chargen on a breadboard, and scanned out the contents. Here's a picture of the scanner in action, and the produced output:
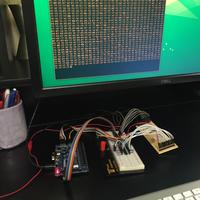
The yellowish board on the right is the VT52 chargen. The Verilog source for the scanner, the scanned data, and some preliminary attempts to convert the data to a few modern font formats are available on my github over at https://github.com/fritzm/vt52. I need to learn some more about font formats to make some better font files; if I do I will update that repo. Any help from fontophiles gladly accepted!
PDP-11/45: CPU Backplane and logic
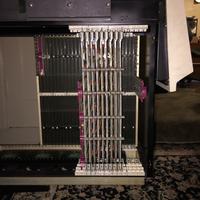
Fri 03 July 2015 by Fritz MuellerMounted the CPU backplane, and slotted in the CPU and MMU logic cards. The empty slots on the right are for the FPU -- I have those on hand but figure I'll wait to slot them until I've got the basic CPU up and running.
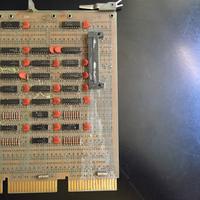
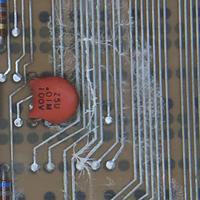
One kind of interesting thing: the logic boards were stored vertically for several decades, and on some of the cards with plastic ribbon-cable connectors the plastic seems to have flaked and shed and fallen down the boards. The flaky substance then grew some impressive crystals between some of the solder traces. Scrubbed these out with some anhydrous IPA.
A tip copied from a fellow restorer: Alconox detergent for removing grime from various plastic components. Parts soaked overnight come out looking nearly new (here you can see the cleaned plastic card guides).
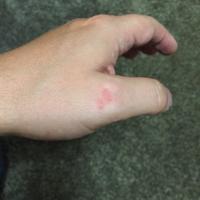
Also pictured here are the characteristic bloody knuckles that are obtained whenever wrestling with PDP backplanes, logic cards, and terminators in close confines. That really takes you back...
PDP-11/45: H742s and front panel
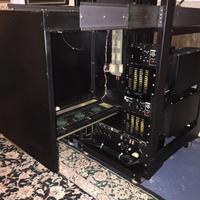
Sun 21 June 2015 by Fritz MuellerThe H742 supplies are now back together, mounted in the cabinet, and wired through to the 861. I've powered them up and run them for minutes at a time (without any DC regulator loads) and there have been no surprise detonations...
The repainted cabinet side door has also been remounted.
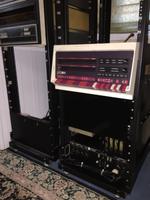
Spent some time on the front panel as well. Removed the tubular lock and took a trip to the local locksmith to have a new key made up. Replaced all the incandescent indicator lamps with the closest modern equivalent. Panel is now remounted and it's starting to look like a real '11!
PDP-11/45: AC power and cooling
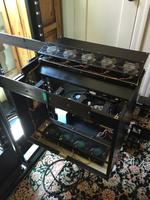
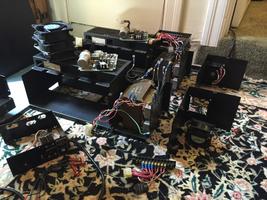
Sun 07 June 2015 by Fritz MuellerSpent a lot of time over a couple weekends cleaning and reconditioning all the muffin cooling fans for the CPU cabinet and power supplies. As you can see in the photo below, there are a lot of these! All reassembled now, and wired along with the back-of-cabinet power distribution board. Also did a clean on the big box fan at the top of the rack, not seen here.
I have also completely torn down the H742s to give them a thorough clean, touch up a few last corrosion spots, and replace the failing neon indicators.
PDP-11/45: H742 power control boards
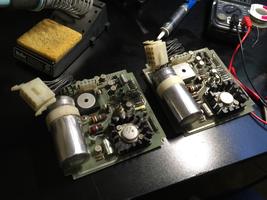
Sat 23 May 2015 by Fritz MuellerFound a little time to clean up and go through the power control boards for the H742 supplies. They are looking pretty good. Even the big electrolytics seem fine on first look. These things were built with very high quality components, and they really seem to last and last.
PDP-11/45: Teardown and corrosion remediation
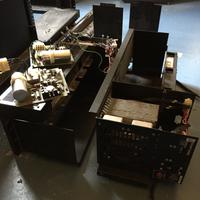
Sat 11 April 2015 by Fritz MuellerHad a little more time to work on the PDP-11 this weekend. Mostly going after some corrosion on the CPU cabinet and H742 power supplies. Tore these down, sanded down the corroded bits, then hit with a satin finish Rustoleum rattle-can which dries to a reasonable approximation of the original powder-coat.
Neon indicators on the H742s are dim and flickery, so ordered some replacements for these, too.
PDP-11/45: 861 AC power control
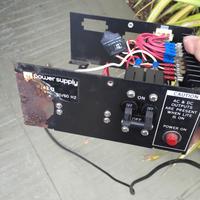
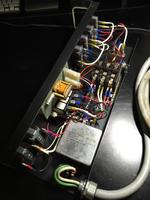
Sun 29 March 2015 by Fritz MuellerWell, might as well start at the beginning with the AC power system, so here's the 861 power control. In very good shape for some 40 year old kit! The neon indicator lamps have gone, so I sourced the modern equivalent and put them on order. Everything else is tight and clean:
PDP-11/45: Begin Again
Sun 15 March 2015 by Fritz MuellerBack in the mid/late '80s, when I was a student at CMU, a computer club member introduced me to the club's nearly forgotten hardware lab. It was still stuffed with remnants of the earlier time-sharing age, including two or three full-cabinet PDP-11 systems with names like "Banshee" and "Centaur". I thought these were the coolest -- CPUs you could see inside, and hack with a soldering iron and a wire wrap gun. Real front panels with lights and toggles, and machine language programming as a physical activity. For a kid fascinated with computers, it was great. You couldn't get closer to the metal; you could quite literally get your head inside these machines.
I began spending off hours in the lab, puttering with the '11s and getting to know them. Eventually, the club decided it was time to clean house and remove all of the older equipment. Most stuff was scheduled to be hauled away to the dump, but I was welcome to anything I wanted to haul away myself in advance. So I bothered some friends with a car, disassembled one of the '11/45s there ("Banshee" I believe) which seemed like the nicest thing, and hauled it off to my off-campus house. There it resided in the basement with many other oddments for some years.
Eventually, I ended up moving out to CA, and after some time the 11/45 CPU was disassembled and packed into moving boxes for the west coast as practically as possible, leaving all the bulkier parts behind.
After a couple of years in CA, I happened on a decommissioned two-rack 11/40 system at Stanford, essentially free for the effort of hauling. This had most of the missing cabinetry, power supplies, and peripherals needed to reconstruct the 11/45! So I procured this and added it to a growing west coast equipment stash. And then real-life set in -- job changes, house moves, raising a kid... Through all of that I held on to all the parts, vowing to "get to it someday". I would pick through the stuff from time to time over the years, but never had the time to take the project very far.
Well, now "someday" is here! The kid is off to college and I've moved house once again, but this time I reserved some working space for the project and pulled all the parts so they are together and accessible. So here we go...
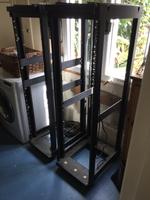
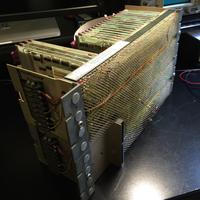
Here are some pics from the first weekend: the two H960 racks that are the bones of the whole thing, some glamor shots of the processor backplane and the RK11-C disk controller, and my buddy Chris helping to remount the RK05 drives on their rails temporarily to keep them off the floor and out of harm's way:
